Students often refer to Maths Mela Class 4 Solutions Chapter 11 Fun with Symmetry Question Answer NCERT Solutions to verify their answers.
Class 4 Maths Chapter 11 Fun with Symmetry Question Answer Solutions
Fun with Symmetry Class 4 Maths Solutions
Class 4 Maths Chapter 11 Solutions
Let Us Do (Pages 164-167)
1. Ink Design
Step 1. Take a sheet of paper and fold it in half.
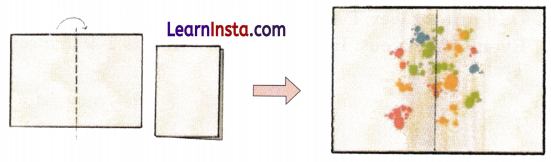
Step 2. Open it and sprinkle some drops of water colours in the centre of the fold.
Step 3. Press it to spread the colour evenly.
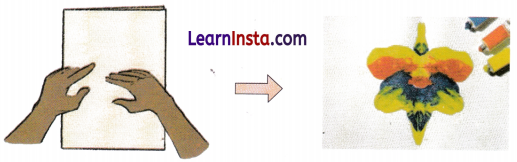
Step 4. Look what you made!
Is it a symmetrical pattern?
Answer:
Yes. The pattern will be identical on both sides of the fold, making it symmetrical.
Where would you draw the line that divides this design into two equal halves?
Answer:
The line will be drawn on the crease of the fold. It divides the design into two identical halves, and it is called the line of symmetry.
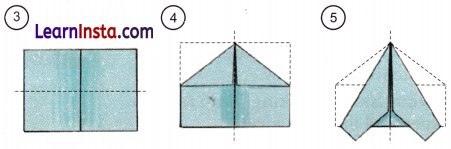
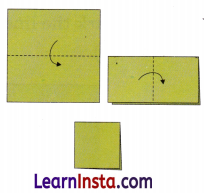
2. Making a paper airplane.
Follow the steps.
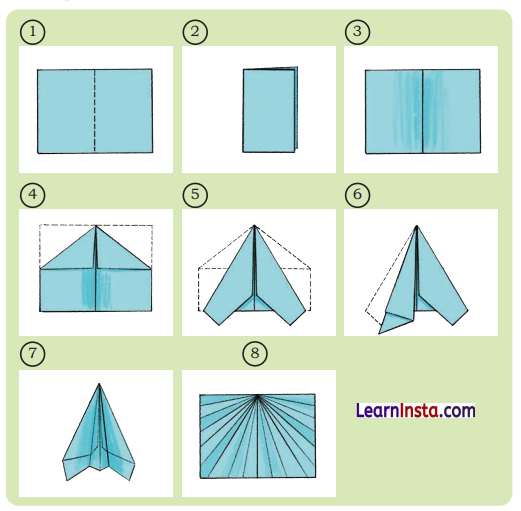
(a) Mark the line of symmetry in Fig. 3, Fig. 4, and Fig. 5.
Answer:
(b) How many lines of symmetry can you see in Fig. 8?
Answer:
Figure 8 has only 1 line of symmetry, which is a vertical line down the centre of the paper airplane.
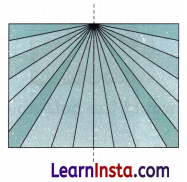
(c) Where will you place a mirror to see the reflection of the right half side of Fig. 8? Will it look the same as the left half side?
Answer:
We will place the mirror in the centre of the Fig. 8 that divides the figure into half. The reflection of the right half side will look the same as the left half side.
(d) Fly the plane.
Answer:
Follow instructions to fold and fly the paper plane.
(e) Will the plane fly if there is no line of symmetry?
Answer: No, if the line of symmetry does not divide the plane in half, then it will not fly.
![]()
(f) Try to make an asymmetrical plane.
Answer:
Fold the plane unevenly. Ensure one side is different from the other.
(g) Fly both the planes and see which plane flies for a longer time.
Answer:
Fly both planes. Observe which plane flies longer. The symmetrical plane should fly longer.
(h) Share your observations with your friends.
Answer:
Discuss finding with others. Compare results and draw conclusions.
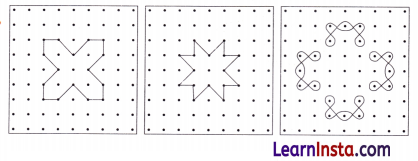
3. Holes and Cuts
Mini has made this design by folding and cutting paper.
Now it’s your turn! Take a square sheet of paper. Do as instructed below.
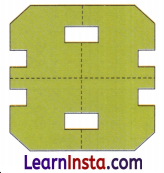
Let us see what Rani is making. Rani takes a piece of paper and folds it twice.
She makes a straight cut at the corner and cuts out two squares on two sides as shown in the picture.
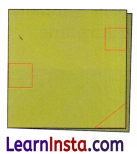
Challenge 1: Where would the hole and cut appear when you open the paper?
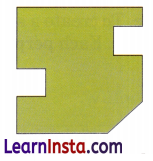
Answer:
When the paper will open, the hole and cut appear as follows:
Challenge 2: Fold a piece of paper once; put two cuts in the middle as shown. How many sides will this shape have when you open the folded paper?
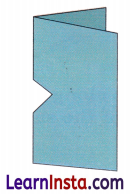
Answer:
The shape have 4 sides.
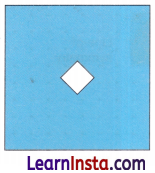
Challenge 3: Fold a paper twice. Where would you cut to make a square hole in the center of the paper? How many cuts are required?
Answer:
Fold a piece of paper twice. To create a square hole in the center, make four cuts on the folded paper. Each perpendiculars to others. This will require 4 cuts.
![]()
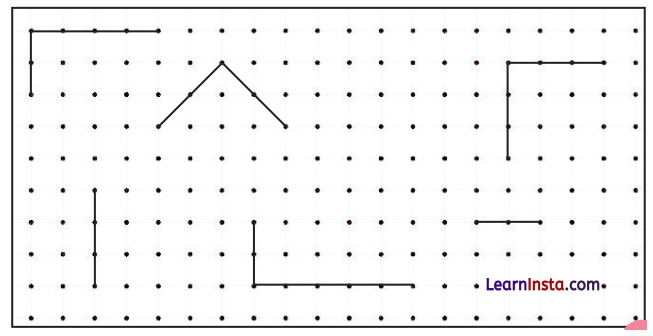
4. Complete the designs below.
Answer:
Let Us Do (Pages 167-170)
Symmetry in Shapes
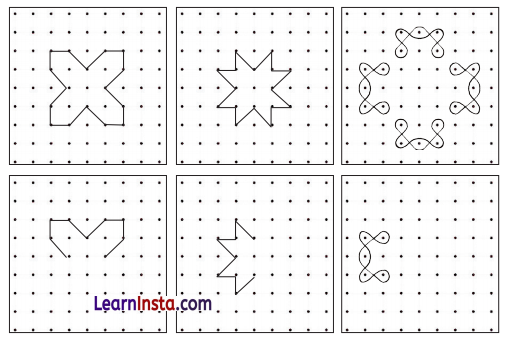
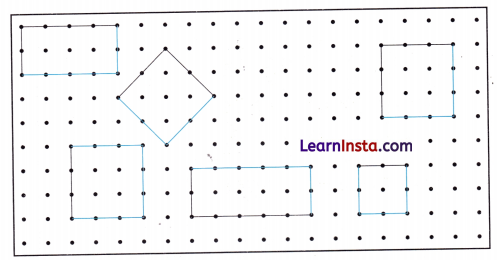
Question 1.
Look at the shapes given along the border. Draw these shapes on the dot grid. Which of the shapes are symmetrical? Draw the lines of symmetry.
Answer:
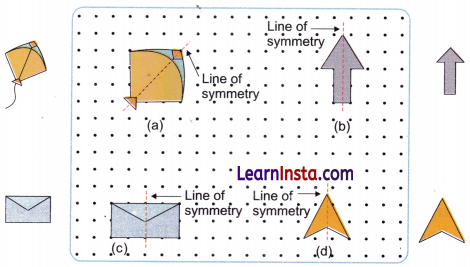
(a), (b), (c) and (d) are symmetrical.
Question 2.
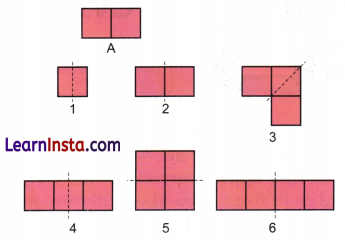
Game with a Mirror
(a) Where should we place the mirror in shape A to get shapes given below?

Answer:
(b) Circle the numbers whose mirror image is the same number.
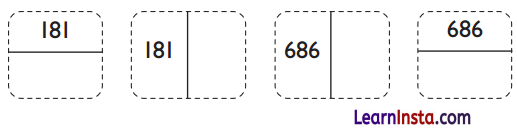
Answer:
Which digits from 0 to 9 have the same mirror image?
Answer:
The digits 0,1 and 8 have the same mirror image.
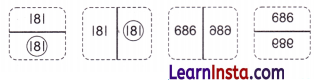
Make some 4-digit numbers such that the mirror image is the same number. Where would you keep the mirror in each case. How many such numbers can you make?
Answer:
Some 4-digit numbers that have the same mirror images are: 1111, 8118, 1881, 8008, 1001, 8888 etc. We will keep the mirror to the left or right side of the number in each case. 9.
![]()
(c) Make similar questions and ask your friends to guess the numbers.
Answer:
Do it yourself.
Question 3.
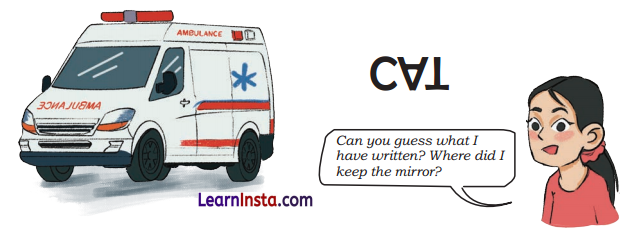
What do you notice about the letters written on the ambulance? Why are they written this way? Discuss.
Answer:
The letters on an ambulance are written laterally inverted (like a mirror image) so they appear correctly when viewed in the rear-view mirror of a vehicle in front. This allows drivers to easily see the word ‘AMBULANCE’ and give way to the ambulance.
Can you guess what I have written? Where did I keep the mirror?
Answer:

It is written CAT and the mirror has been kept horizontally below the word.
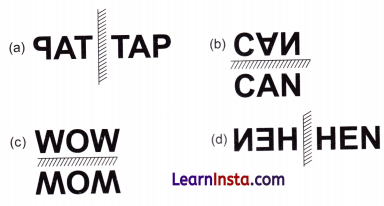
Can you identify these words? Where will you place mirror to read the following words correctly?

Answer:
Now, you try to write some words/names in this way and challenge your friends to guess them.
Answer:
Do it yourself.
Can you also try doing this with the script of your own language?
Answer:
Do it yourself.
![]()
Question 4.
Complete the following to make symmetrical shapes.
Answer:
Question 5.
Observe the shapes. How many sides does each shape have?
How many lines of symmetry does each shape have? You may trace these shapes and check the lines of symmetry by folding the shapes.
Answer:
(a) Triangle -3 sides, 3 Lines of symmetry.
(b) Square – 4 sides, 4 Lines of symmetry.
(c) Pentagon – 5 sides, 5 Lines of symmetry.
Tiling the Tiles (Page 170)
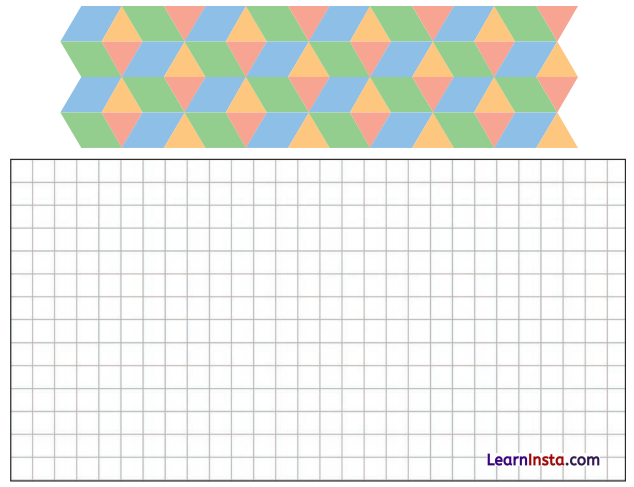
Here are some patterns with tiles. Identify the repeating unit (tile) and continue the patterns.

Answer:
Repeating unit. Smallest shape group (e.g. single square 2 × 2 block). Continue extend by sliding, flipping or rotating unit.
Tiles at the Tile Shop (Pages 171-172)
Bablu Chacha makes beautiful tiles of the kinds shown below. Design creative tiles of your own in the spaces given below. You may use a rangometry kit or shape cutouts.
Question 1.
Which shapes have you used to make the tiles?
Answer:
Triangle, squares and pentagons.
Question 2.
Which of the tiles are symmetrical? Draw the lines of symmetry (if any).
Answer:
Symmetrical (a) Equilateral triangle (3 lines of symmetry) (b) Square (4 lines of symmetry)
![]()
Question 3.
Make more tiles by joining two or more shapes. Trace them in your notebook to create paths with no gaps or overlaps.
Answer:
Join shapes and trace tessellations.
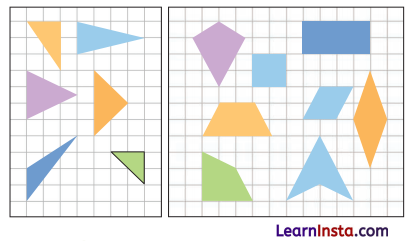
4. Look at the following shapes. What do you notice? Discuss.
Answer:
Shapes may be symmetrical or tessellate.
Let Us Do (Pages 172-174)
Question 1.
Makefloor patterns with yourtile. Mini has made afloor pattern, as shown below. Remember, there should be no overlaps and no gaps.
Answer:
Create tessellating floor pattern.
Question 2.
Making a Catty Wall!
Step 1. Take a square piece of paper. Mark as shown to make the cat’s head and ears.

Step 2. Now, cut along the outline and slide the top piece down to align with the larger piece.

Step 3. Tape the pieces together.

Step 4. Now the real fun begins! Trace the outline of the cat pattern on a large piece of paper and make its face.

Your wall is ready.

Create more of these tiles. Some ideas to make creative wall patterns are given below.
Isn’t it fun? Just cut, slide, and paste. Your tile is ready to make.a creative wall.
Answer:
Do it yourself.
Question 3.
Let us go on a nature walk (Project time)
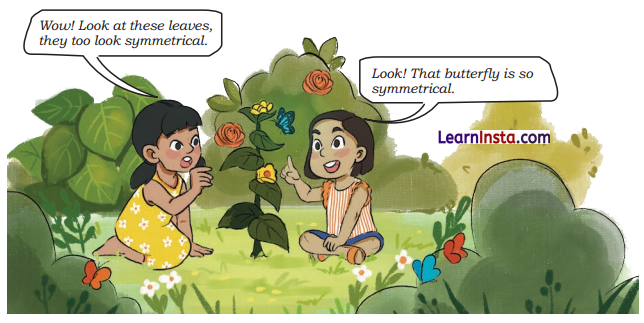
Go for a nature walk to a nearby park or around your school with your teacher or your parents. Observe the patterns, designs, or symmetry around you carefully. Collect leaves, petals, and flowers that have fallen on the ground.
In your project file:
Categorise the leaves into symmetrical and non-symmetrical.
Make different designs and patterns with leaves and flowers.
Make a greeting card using imprints of leaves or dry flowers.
Create animals or designs using leaves and flowers.
Answer:
Do it yourself.